# Build a Flutter video chat app with Zoom Video SDK
[Zoom Video SDK](/docs/video-sdk/) lets you add real-time audio and video to your application easily, backed by the powerful Zoom technology users love. In this guide, we'll explore using the Video SDK to create a video chat application with Flutter, an open source framework that simplifies building natively compiled multi-platform applications from a single codebase.
You can find the code for this blog on [GitHub](http://github.com/zoom/VideoSDK-flutter-quickstart).
Prerequisites:
- [Flutter development environment](https://docs.flutter.dev/get-started/install) set up
- A Zoom [Video SDK Account](/docs/video-sdk/get-credentials/)
## Step 1: Create a new Flutter project
To start, we'll create a new Flutter project. Open a terminal and execute:
```bash
$ flutter create zoom_flutter_hello_world
$ cd zoom_flutter_hello_world
```
This will create a new Flutter project with the following structure:
```bash
.
├── android
├── ios
├── lib
│ └── main.dart
├── pubspec.yaml
├── test
└── web
```
## Step 2: Configuring the project
**Install the dependencies**
We will install the Zoom Video SDK for Flutter and the JWT package. Add the following to your `pubspec.yaml` file:
```yaml
dependencies:
flutter:
sdk: flutter
flutter_zoom_videosdk: ^1.7.0
dart_jsonwebtoken: ^2.12.1
```
Run `flutter pub get` to install the dependencies.
**Add permissions**
For iOS, add the following to your `ios/Runner/Info.plist` file:
```xml
NSCameraUsageDescription
For video conferencing
NSMicrophoneUsageDescription
For audio conferencing
```
**Config file**
Let's create a `config.dart` file in the `lib` directory to store our Zoom SDK credentials and session details:
```dart
const Map configs = {
'ZOOM_SDK_KEY': 'YOUR_ZOOM_SDK_KEY',
'ZOOM_SDK_SECRET': 'YOUR_ZOOM_SDK_SECRET',
};
const Map sessionDetails = {
'sessionName': 'TestOne',
'sessionPassword': '',
'displayName': 'Flutter',
'sessionTimeout': '40',
'roleType': '1',
};
```
> **Disclaimer**: _To demo the app, we'll be using the Zoom Video SDK credentials to generate a JWT from within the application. In production use-cases do not store your app key and secret inside your app. This is not a safe operation, instead use a server to generate the tokens and request them in your app instead._
## Step 3: Setting up the main app
Let's update the `main.dart` file to initialize the Zoom Video SDK. We'll start by importing the necessary packages and creating the `Videochat` widget:
```dart
import 'package:flutter/material.dart';
import 'package:flutter_zoom_videosdk/native/zoom_videosdk.dart';
import 'package:zoom_flutter_hello_world/videochat.dart';
class ZoomVideoSdkProvider extends StatelessWidget {
const ZoomVideoSdkProvider({super.key});
@override
Widget build(BuildContext context) {
var zoom = ZoomVideoSdk();
InitConfig initConfig = InitConfig(
domain: "zoom.us",
enableLog: true,
);
zoom.initSdk(initConfig);
return const Videochat();
}
}
```
We'll initialize the Zoom Video SDK in the `ZoomVideoSdkProvider` widget and return the `Videochat` widget.
We'll create the `Videochat` widget next. Let's update the `main` function to use the `ZoomVideoSdkProvider` widget:
```dart
void main() {
runApp(
MaterialApp(
title: 'Zoom Flutter Hello World',
home: const SafeArea(
child: ZoomVideoSdkProvider(),
),
),
);
}
```
## Step 4: Building the video chat component
Now, let's create a new file `lib/videochat.dart` that will contain the video chat component.
We'll add the imports for the different packages we'll be using and defined the `Videochat` widget that will render the video chat UI:
```dart
import 'dart:async';
import 'dart:convert';
import 'package:flutter/material.dart';
import 'package:zoom_flutter_hello_world/config.dart';
import 'package:zoom_flutter_hello_world/utils/jwt.dart';
import 'package:flutter_zoom_videosdk/native/zoom_videosdk.dart';
import 'package:flutter_zoom_videosdk/native/zoom_videosdk_user.dart';
import 'package:flutter_zoom_videosdk/native/zoom_videosdk_event_listener.dart';
import 'package:flutter_zoom_videosdk/flutter_zoom_view.dart' as zoom_view;
class Videochat extends StatefulWidget {
const Videochat({super.key});
@override
State createState() => _VideochatState();
}
```
The `_VideochatState` class will contain the video chat logic:
```dart
class _VideochatState extends State {
final zoom = ZoomVideoSdk();
final eventListener = ZoomVideoSdkEventListener();
bool isInSession = false;
List subscriptions = [];
List users = [];
bool isMuted = true;
bool isVideoOn = false;
bool isLoading = false;
```
We define the state variables for our video chat component: `zoom` and `eventListener` to access the Zoom Video SDK and set up event listeners.
`subscriptions` to store the list of subscriptions, `isInSession` for session state, `users` to store the list of users in the session, `isMuted` for user mic state, `isVideoOn` for user camera state, and `isLoading` to show a loading state when joining a session.
### Event Listeners
The Zoom Video SDK gives you access to events for various actions, like when a user joins a session, leaves a session, etc. We'll set up event listeners to handle events and manage the app state:
```dart
_handleSessionJoin(data) async {
if (!mounted) return;
final mySelf = ZoomVideoSdkUser.fromJson(jsonDecode(data['sessionUser']));
final remoteUsers = await zoom.session.getRemoteUsers() ?? [];
final isMutedState = await mySelf.audioStatus?.isMuted() ?? true;
final isVideoOnState = await mySelf.videoStatus?.isOn() ?? false;
setState(() {
isInSession = true;
isLoading = false;
isMuted = isMutedState;
isVideoOn = isVideoOnState;
users = [mySelf, ...remoteUsers];
});
}
```
The `_handleSessionJoin` method updates the state when a session is joined. It also updates the user list, adding the self object and the remote users to the list. It also updates the video and audio states based on the user's audio and video status.
```dart
_updateUserList(data) async {
final mySelf = await zoom.session.getMySelf();
if (mySelf == null) return;
final remoteUserList = await zoom.session.getRemoteUsers() ?? [];
remoteUserList.insert(0, mySelf);
setState(() {
users = remoteUserList;
});
}
```
The `_updateUserList` method updates the user list when remote users join or leave the session.
```dart
_handleVideoChange(data) async {
if (!mounted) return;
final mySelf = await zoom.session.getMySelf();
final videoStatus = await mySelf?.videoStatus?.isOn() ?? false;
setState(() {
isVideoOn = videoStatus;
});
}
```
The `_handleVideoChange` method updates the local user's camera status when it changes.
```dart
_handleAudioChange(data) async {
if (!mounted) return;
final mySelf = await zoom.session.getMySelf();
final audioStatus = await mySelf?.audioStatus?.isMuted() ?? true;
setState(() {
isMuted = audioStatus;
});
}
```
The `_handleAudioChange` method updates the local user's mic status when it changes.
Finally, we'll create a function `_setupEventListeners` to attach the event listeners and add them to the `subscriptions` list:
```dart
_setupEventListeners() {
subscriptions = [
eventListener.addListener(EventType.onSessionJoin, _handleSessionJoin),
eventListener.addListener(EventType.onSessionLeave, handleLeaveSession),
eventListener.addListener(EventType.onUserJoin, _updateUserList),
eventListener.addListener(EventType.onUserLeave, _updateUserList),
eventListener.addListener(EventType.onUserVideoStatusChanged, _handleVideoChange),
eventListener.addListener(EventType.onUserAudioStatusChanged, _handleAudioChange),
];
}
```
We can use the `subscriptions` list to cancel the event listeners as part of the cleanup process.
### Session Management
Now, let's define methods to start and leave a session:
```dart
Future startSession() async {
setState(() => isLoading = true);
try {
final token = generateJwt(sessionDetails['sessionName'], sessionDetails['roleType']);
_setupEventListeners();
await zoom.joinSession(JoinSessionConfig(
sessionName: sessionDetails['sessionName']!,
sessionPassword: sessionDetails['sessionPassword']!,
token: token,
userName: sessionDetails['displayName']!,
audioOptions: {"connect": true, "mute": true},
videoOptions: {"localVideoOn": true},
sessionIdleTimeoutMins: int.parse(sessionDetails['sessionTimeout']!),
));
} catch (e) {
debugPrint("Error: $e");
setState(() => isLoading = false);
}
}
```
The `startSession` method generates a JWT token and joins a video session using the `zoom.joinSession` method, passing in the `JoinSessionConfig` object. We can access the `sessionDetails` from the `config.dart` file. Before joining the session, we set up the event listeners by calling the `_setupEventListeners` method.
We'll define a callback function `handleLeaveSession` to reset the app state when the user leaves a session and cancel all the event subscriptions:
```dart
handleLeaveSession([data]) {
setState(() {
isInSession = false;
isLoading = false;
users = [];
});
for (var subscription in subscriptions) {
subscription.cancel();
}
}
```
We'll call this function when the user clicks the leave button.
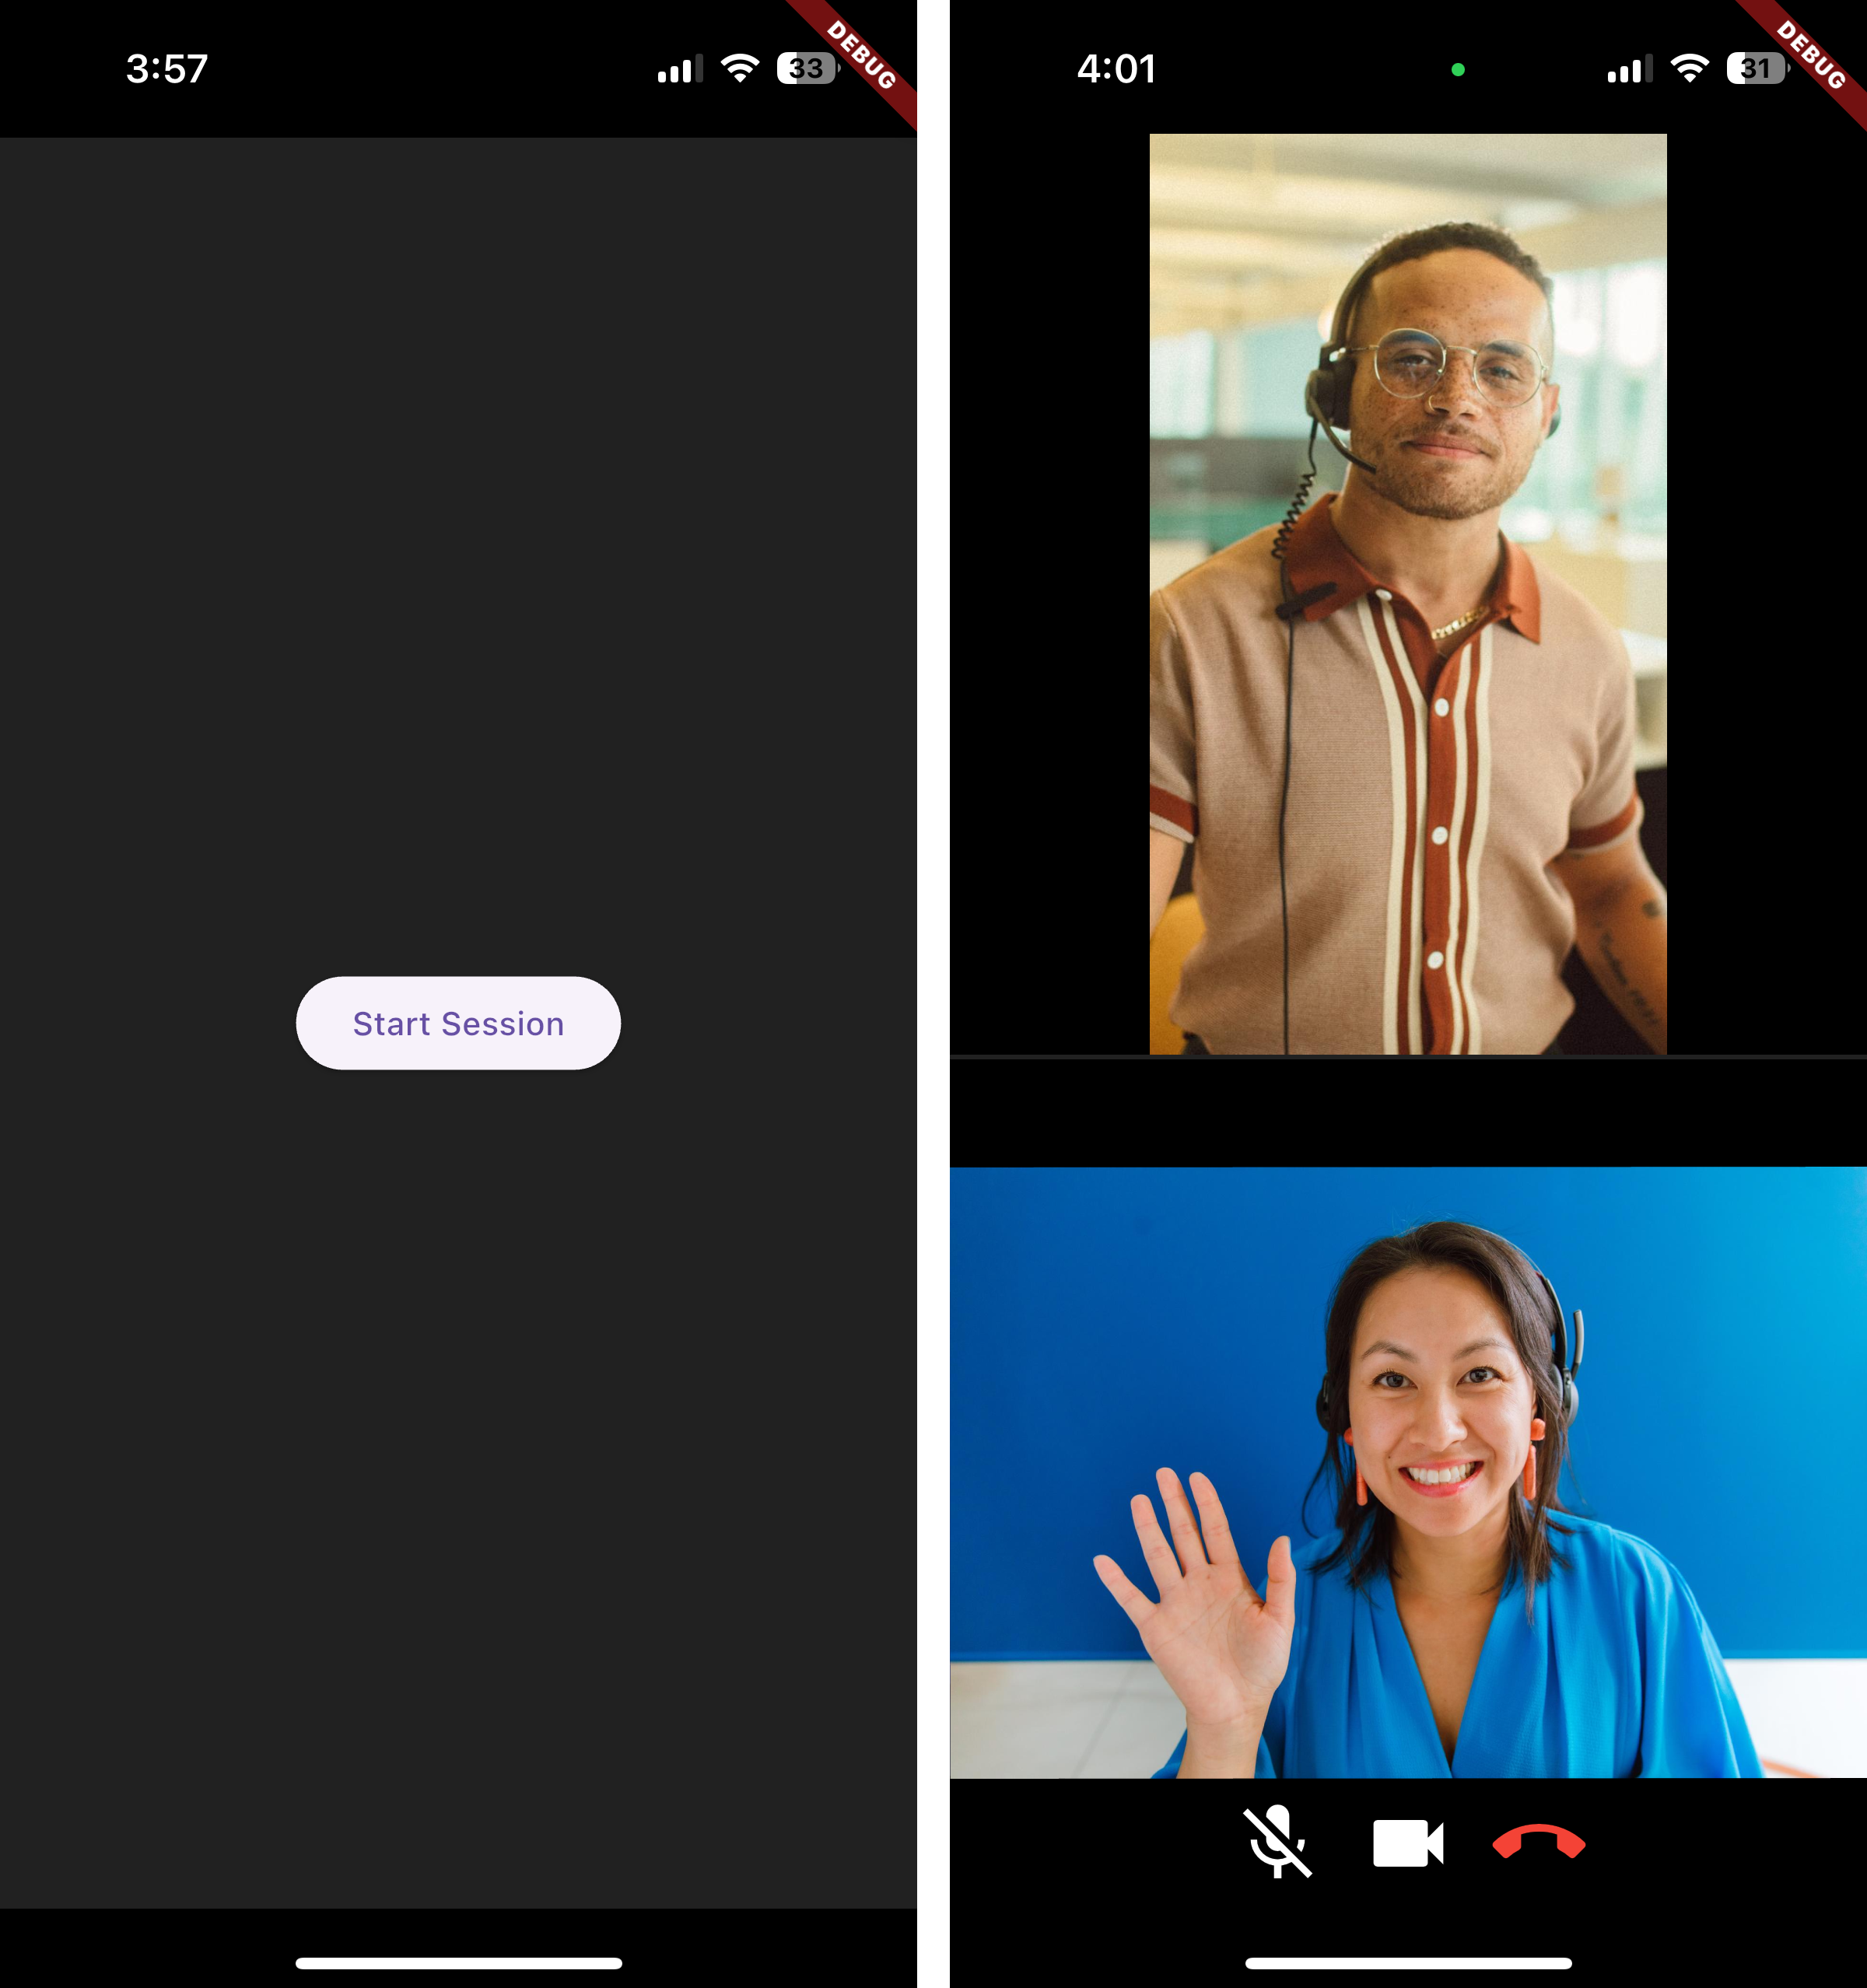
## Step 5: Building the UI
Now, let's build the UI for our video chat screen:
```dart
@override
Widget build(BuildContext context) {
return SafeArea(
child: Scaffold(
backgroundColor: Colors.grey[900],
body: Stack(
children: [
if (!isInSession)
Center(
child: ElevatedButton(
onPressed: isLoading ? null : startSession,
child: Text(isLoading ? 'Connecting...' : 'Start Session'),
),
)
else
Stack(
children: [
VideoGrid(users: users),
ControlBar(
isMuted: isMuted,
isVideoOn: isVideoOn,
onLeaveSession: handleLeaveSession,
),
],
),
],
),
),
);
}
}
```
We display a button to start the session when the user is not in a session. When the user is in a session, we display a grid of video tiles using the `VideoGrid` component passing in the `users` list. We also display a bar at the bottom of the screen using the `ControlBar` component passing in the `isMuted` & `isVideoOn` states for the mute/unmute audio and video buttons. We also pass in the `handleLeaveSession` method to the `onLeaveSession` prop that we'll call when the user clicks the leave button.
### Video Grid Component
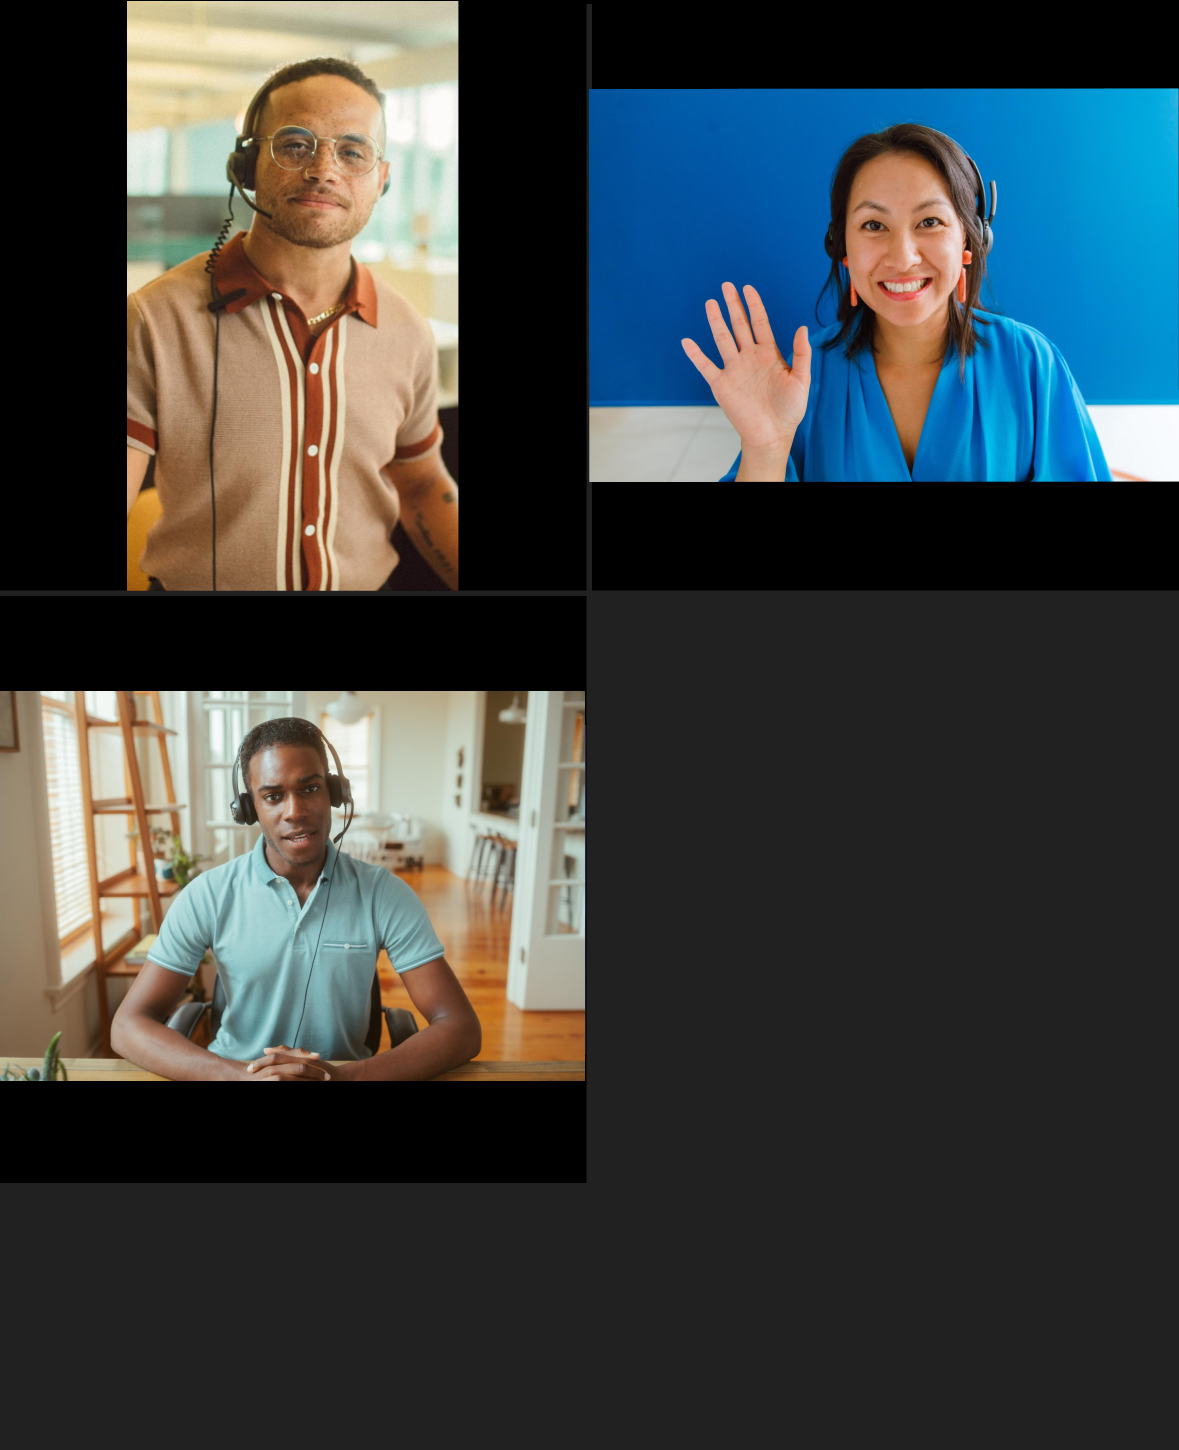
Let's create a component to display the video grid:
```dart
class VideoGrid extends StatelessWidget {
final List users;
const VideoGrid({
super.key,
required this.users,
});
@override
Widget build(BuildContext context) {
if (users.isEmpty) {
return const Center(child: CircularProgressIndicator());
}
return GridView.builder(
physics: const NeverScrollableScrollPhysics(),
gridDelegate: SliverGridDelegateWithFixedCrossAxisCount(
crossAxisCount: users.length <= 2 ? 1 : 2,
crossAxisSpacing: 2,
mainAxisSpacing: 2,
),
itemCount: users.length,
itemBuilder: (context, index) => _VideoTile(user: users[index]),
);
}
}
```
The `VideoGrid` component displays a loading indicator when there are no users, and a grid of video tiles when there are users using the `GridView` widget adjusting the size based on the number of users.
### Video Tile Component
Now, let's create a component to display individual video tiles:
```dart
class _VideoTile extends StatelessWidget {
final ZoomVideoSdkUser user;
const _VideoTile({required this.user});
@override
Widget build(BuildContext context) {
return Material(
color: Colors.black,
child: SizedBox.expand(
child: zoom_view.View(
key: Key(user.userId),
creationParams: {
"userId": user.userId,
"videoAspect": VideoAspect.FullFilled,
"fullScreen": false,
},
),
),
);
}
}
```
The `_VideoTile` component displays a video tile for a user using the `zoom_view.View` widget. We pass the `user.userId` to the creation params to identify the user.
## Step 6: Building the control bar

Let's create the final piece of UI, the `ControlBar` component. This component will display buttons to mute/unmute the mic and camera along with a button to leave the session:
```dart
class ControlBar extends StatelessWidget {
final bool isMuted;
final bool isVideoOn;
final double circleButtonSize = 40.0;
final zoom = ZoomVideoSdk();
final VoidCallback onLeaveSession;
ControlBar({
super.key,
required this.isMuted,
required this.isVideoOn,
required this.onLeaveSession,
});
```
The `ControlBar` component uses the `isMuted` and `isVideoOn` variables to track the mute/unmute state of the mic and camera. We also access the `onLeaveSession` callback function that we defined in the `Videochat` component for performing the cleanup after leaving the session.
We'll define the `toggleAudio` function to toggle the audio status when the user clicks the mute/unmute audio button:
```dart
Future toggleAudio() async {
final mySelf = await zoom.session.getMySelf();
if (mySelf?.audioStatus == null) return;
final isMuted = await mySelf!.audioStatus!.isMuted();
isMuted ? await zoom.audioHelper.unMuteAudio(mySelf.userId) : await zoom.audioHelper.muteAudio(mySelf.userId);
}
```
We use the `muteAudio` and `unMuteAudio` methods on the `audioHelper` object to mute and unmute the audio.
We'll define the `toggleVideo` function to toggle the video status when the user clicks the mute/unmute video button:
```dart
Future toggleVideo() async {
final mySelf = await zoom.session.getMySelf();
if (mySelf?.videoStatus == null) return;
final isOn = await mySelf!.videoStatus!.isOn();
isOn ? await zoom.videoHelper.stopVideo() : await zoom.videoHelper.startVideo();
}
```
We use the `stopVideo` and `startVideo` methods on the `videoHelper` object to stop and start the video.
Finally, we'll define the `leaveSession` function to leave the session when the user clicks the leave button:
```dart
Future leaveSession() async {
await zoom.leaveSession(false);
onLeaveSession();
}
```
We use the `leaveSession` method to leave the session and call the `onLeaveSession` function to call the `handleLeaveSession` method to reset the app state.
We can now build the UI for the `ControlBar` component:
```dart
@override
Widget build(BuildContext context) {
return Align(
alignment: Alignment.bottomCenter,
child: FractionallySizedBox(
child: Row(
mainAxisAlignment: MainAxisAlignment.center,
children: [
IconButton(
onPressed: toggleAudio,
icon: Icon(
isMuted ? Icons.mic_off : Icons.mic,
),
iconSize: circleButtonSize,
tooltip: isMuted ? "Unmute" : "Mute",
color: Colors.white,
),
IconButton(
onPressed: toggleVideo,
iconSize: circleButtonSize,
icon: Icon(
isVideoOn ? Icons.videocam : Icons.videocam_off,
color: Colors.white,
),
),
IconButton(
onPressed: leaveSession,
iconSize: circleButtonSize,
icon: const Icon(Icons.call_end, color: Colors.red),
),
],
),
),
);
}
}
```
We use `IconButton` to create the mute/unmute audio and video buttons and the leave button. We pass in the `toggleAudio` and `toggleVideo` methods to the `onPressed` prop and the `leaveSession` method to the `onPressed` prop of the leave button.
## Step 7: Running the app
You can run the app using the following command:
```bash
flutter run
```
This will start the Flutter development server and open the app on your connected device or emulator.
> Note: Emulators may not be able to access the camera, you'll see an empty video view. Please use a physical device to demo the video functionality.
## Conclusion
Congratulations! You've successfully integrated video and audio conferencing into your Flutter application using the Zoom Video SDK.
This is just the beginning of what you can do with the Video SDK! You can add other features like screen sharing, chat, cloud recording, and live transcriptions. More information is available under the _Add Features_ section in the [Zoom Video SDK for Flutter](/docs/video-sdk/flutter/) documentation.